
News
Current Fingerprints:
2048 05:66:1f:4c:1f:83:9c:dc:9d:31:2e:10:aa:30:a4:c7 (RSA1)2048 01:b3:2a:38:f5:eb:7b:8b:48:2d:ad:ae:e2:bf:a4:79 (RSA)
1024 3d:53:65:bf:18:9d:c0:f0:86:80:1a:7e:87:e8:05:64 (DSA)
2048 18:88:d8:31:49:5a:2a:35:4c:49:94:48:a1:1f:8f:5d (RSA)
1024 31:61:c7:53:29:c2:af:91:8d:89:48:e9:d3:d1:53:b0 (DSA)
If your SSH program ever tells you that they change, please check the new value against this list, and contact the administrator immediately, as it could indicate that someone has been hacked.
Wed Oct 23 2013
BIG NEWS! The upgrade was finally successful. The main server at 150.108.20.61 now has 96 GiB of memory and 8 cores. The secondary server at 150.108.20.62 now has 32 GiB of memory and 8 cores. The new VMWare version means that we can dynamically increase the system memory when necessary (please let me know if your work needs more!)
Additionally, Sage has been updated to 5.12, Magma has been updated to 2.19-10, and Mathematica has been updated to 9.01.
Fri Sep 28 2013
We expect the hardware upgrade to take place next week, probably Wednesday, October 2. If you have long-running jobs, you may want to wait until after the upgrade to start them, so that they are not disturbed.
Thu Aug 15 2013
Sage has been upgraded to version 5.11, with all doctests passing. You can find it at /app/sage-5.11/sage or at /app/bin/sage (which should already be in your command path, so just sage will do).
Errors are cropping up with the System Status graphs, due to poor configuration of the faculty.fordham.edu FTP server. I'm looking into a workaround, but for now the graphs may be truncated or slightly out-of-date. If you are logged into the server, you can always use top or htop to see live status on that server.
Sat Aug 10 2013
The new website, http://faculty.fordham.edu/rcc, is up! Initial documentation is available.
The system is still in `test harness' phase, as we await the delivery of more powerful hardware. Please run jobs and test the environment, but don't expect your jobs to run more quickly than on a standard workstation. Contact the administrator at rcc@fordham.edu if there is anything you need.
I am currently in the process of trying to install SPSS, SAS, and Mathematica from the existing university licenses. There are various annoying technical difficulties, due to poorly made installer programs and version incompatibilities that I'm trying to work out.
A MatLab license needs to be purchased. The best bet is to pool our FREPs ($400 per TT faculty per year) to get a license.
Sat Aug 9 2013
Current System Status
- ace-math01.ace.fordham.edu,
Last Updated:

- ace-math03.ace.fordham.edu,
Last updated:

- burr (math dept only),
Last updated:

About the RCC
What is it?
The Research Computation Cluster (RCC) provides a stable and current Red Hat Enterprise Linux environment for computation and data analysis. The primary means of access is Secure Shell (SSH) and the usual Linux command-line environment.
What can it do?
The RCC provides a full suite of open-source scientific and programming tools, including:
- R
- Macaulay2
- Pari/GP
- Sage
- Python, NumPy, SciPy
- Octave
- Java
- traditional C, C++, Fortran compilers and libraries
- git, mercurial, subversion, CVS, and many others
- MatLab
- Mathematica
- Maple
- SPSS
- SAS
Where is it? Who owns it?
150.108.20.61 (ace-math01.ace.fordham.edu)
150.108.20.62 (ace-math03.ace.fordham.edu)
150.108.68.34 (math department only)
As hardware expands through the summer, the number and power of the machines will grow. At the physical level, the hardware is in the basement of Keating Hall. The hardware was purchased as part of the Academic Computing Environment [ACE].
Filesystem and Program Locations
How are jobs and resources allocated among users?
This is a multi-user system, and many users may be running jobs at once. Of course, the system is made to be used. There are two things to balance: Processor allocation and memory allocation.
Processor time is easy to sub-divide, as it is divided into time-steps called "jiffies". During a single jiffy on a single processor core, a single process may be run. Thus, if there are two jobs with equal priority are running on the same processor core, the Linux kernel allocates every-other jiffy to each job. Thus, in real time, each job runs half as quickly as it could on its own core. In that sense of time-sharing, CPU time is infinitely divisible.
Memory allocation is more difficult. The machine has a fixed amount of fast physical memory as well as some slow overflow space on disk that is called "swap". Jobs request memory as they run, and there is no way to forcibly remove memory from a job without killing that job. Of course, the Linux kernelneeds some memory to keep essential processes running, too. Therefore, if too much memory is requested by running jobs, the Linux kernel enters the dreaded Out-Of-Memory [OOM] condition and risks crashing. This is like having too much cargo on a sinking ship --- if you can quickly throw some containers overboard, the rest of the ship might be saved. The kernel must decide which jobs to kill.
To deal with both of these problems, there is an hourly process that examines all of the running jobs and classifies them as "young" or "old". Once a job has used 12 processor-hours, it is classified as "old," and thereafter receives 50% of the share of a young job. So, instead of each job getting every-other jiffy, the young job gets two jiffies of every three. The goal is to get short jobs out of the queue as rapidly as possible. Also, "old" jobs are the first to have their active memory pushed to slow disk swap in the event that system memory is low.
However, old jobs are increasingly protected from being killed by the Out-Of-Memory killer. Obviously, your fellow researchers get very upset when a 2-month-old job was killed because your runaway 10-second job ate all the memory. Under the current configuration, by the time a job has been running for 10 CPU-days, it should never be killed by an Out-Of-Memory condition (unless the entire machine crashes for some horrible reason). On the system status pages (linked above), you can see the "OOM Score". The higher the score, the more likely a job is to be killed in an OOM condition. A score of -1000 means "never kill"; a score of "0" is neutral. Even with this fix, we have the potential problem that many 10-day-old jobs could eat all the memory and sink the ship, so please be careful. There is essentially no way to guarantee that OOM will never happen.
Instructions for SSH for Linux and MacOS
Theoretical Background of SSH authentication
- Your workstation must know that the server is actually the machine it claims to be, to detect whether some malicious third party has replaced the server. This is the role of the server fingerprint.
- The server must know that the person sitting at the client machine is authorized to access to requested account. This is the role of the keypair that you generate with ssh-keygen and unlock with ssh-agent on your workstation.
- Once identities have been established, all network communications must be encrypted with a strong cipher. This is auto-generated for each connection, using Diffie--Hellman-style key-exchange to make a shared 128-bit AES key.
Generating a Keypair (once per workstation)
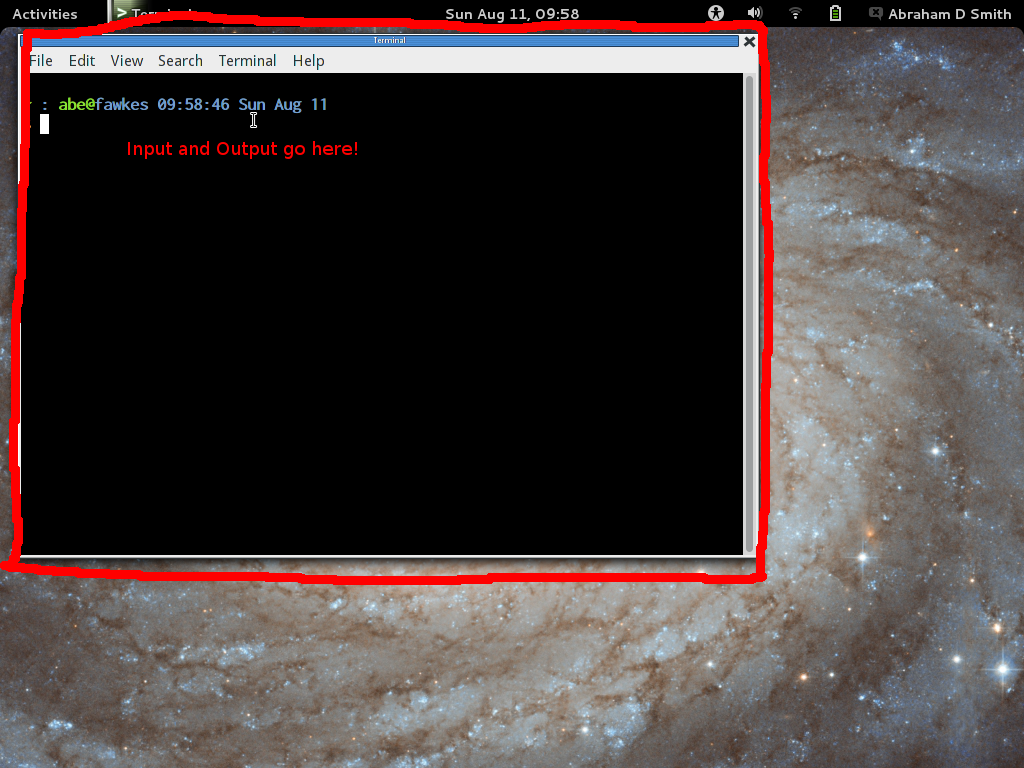
- Open a Terminal window. If you cannot find a launch icon on MacOS,
try hitting Command+Space to search and type
"terminal". If
you cannot find a launch icon on Linux, try hitting Alt+F2 and
try "gnome-terminal" or "konsole" or the
old-fashioned "xterm".
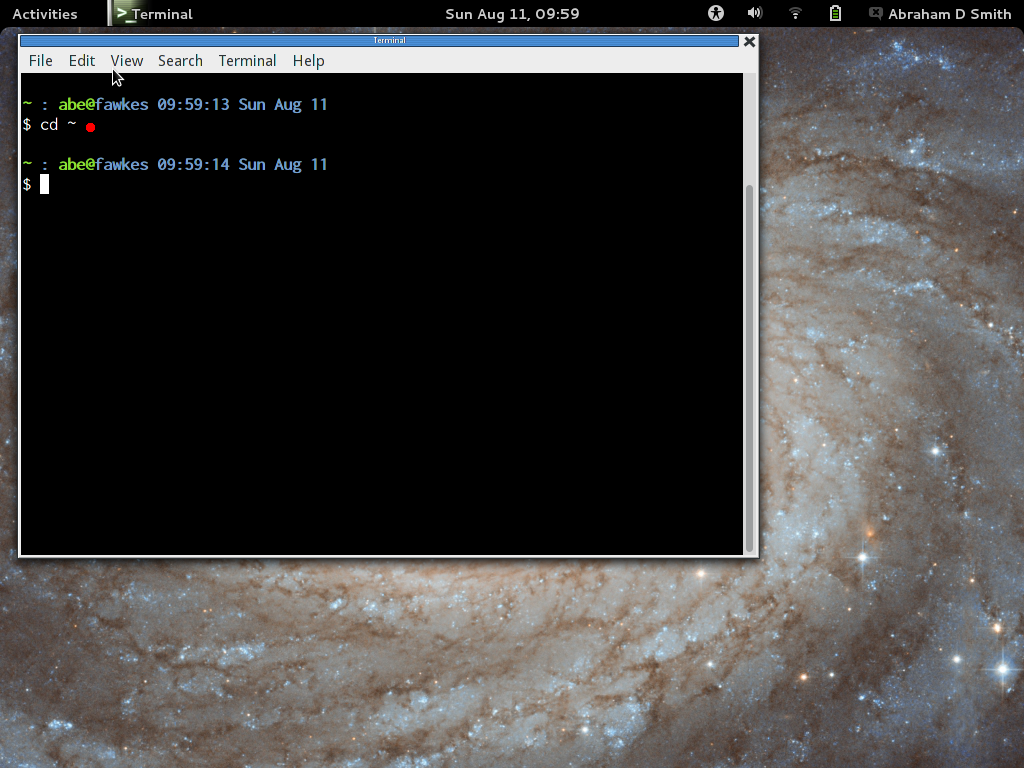
- In the terminal, type "cd ~" to make sure you are in your
home directory. (Remember that "~" is always the alias for
your home directory.)
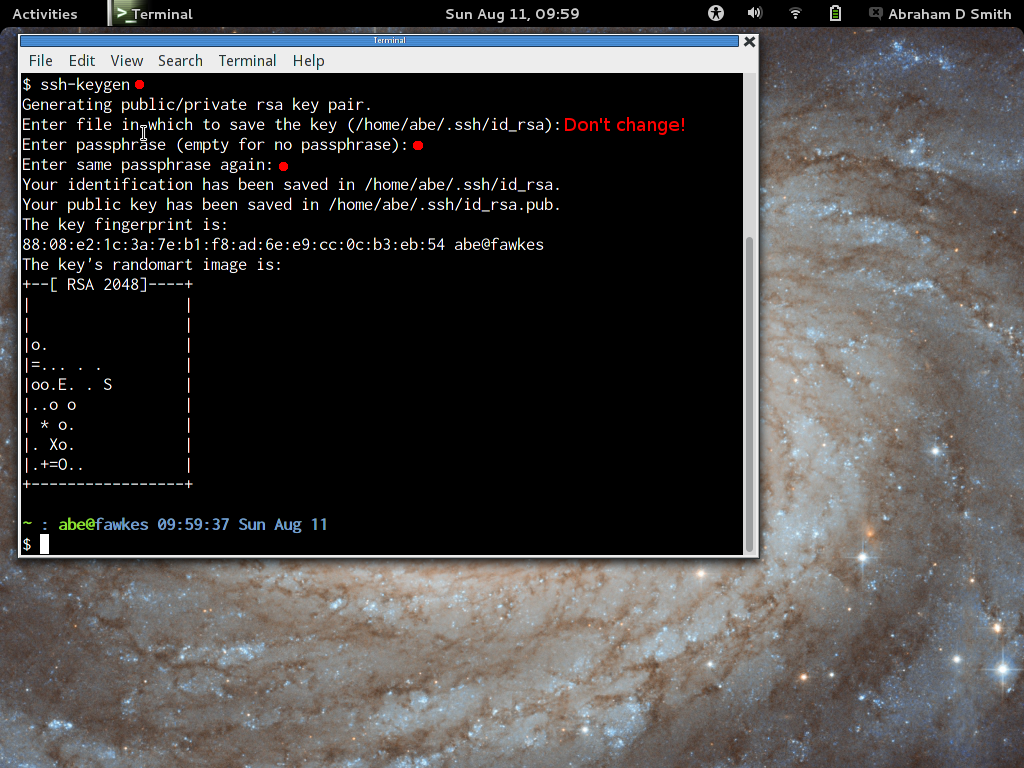
- In the terminal, type "ssh-keygen". Do not change the
default filename. You should use a long passphrase to protext
your keypair. You don't have to enter the passphrase very often (only
once per day or once per reboot, probably), so make it very long and
easy to remember. For passphrases, length is more important than crazy
characters. Try something like a complete sentence telling a little
story: "When Sally was an 8-year-old, her Labrador puppy Henry ate
the birthday cake."
-
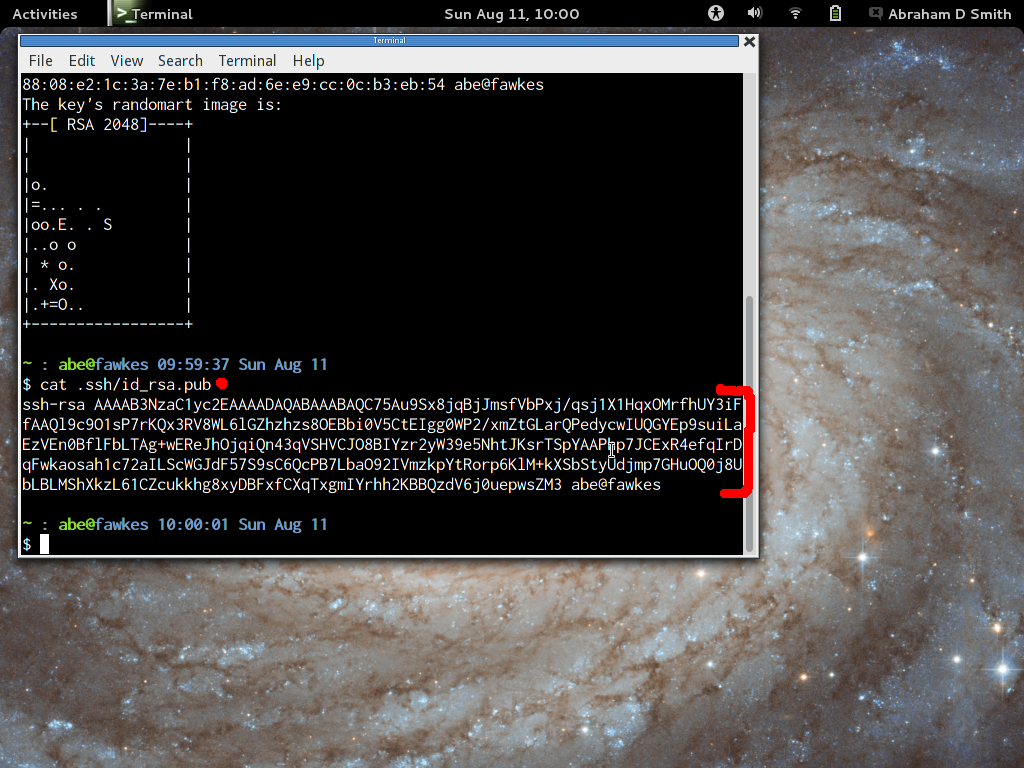
After you have generated your keypair, type
"cat ~/.ssh/id_rsa.pub" to see the Public portion of your
keypair. It will look something like this:
ssh-rsa AAAAB3NzaC1yc2EAAAADAQABAAABAQCnTaP2CdEB7qxtEPNEIviiZPftqiu79tgFsUA8VgU0qagUQljMBgAixw5Zmu7bLsF+ILFvHxjr1OAOOlE79xY
uqYBy8GFeFTiJzznzkeJzAYK/rKfTcrRO8EYLuIgPvTy8/bKrbCwzIKZu8aJ8k1GF9QshVTn/2UKC6ejRip3XDPmfrM7zg0qVkL5ruoT4VNqdhhdnl6hL8cxI8Y
F+Kb9zRQgiwgtXJWlwsDpcKXsqbohvfw/GuJv3e6l7Z/l2susqlvm7xzUMWf2sdW5mc45Lqac/aVyLsoYBJV158caD6MAxeaWrsN9An+I+Fqk7Bb4kjFUPPiCIl
Qe0VZtX93Jkd smith@quark.cis.fordham.edu
- Copy the text and paste it into the RCC Account Application Form or email it to the administrator at rcc@fordham.edu. You will have to wait until the administrator makes the account, but that usually takes less than a day.
Starting ssh-agent (once per reboot of your workstation)
- Open a terminal and type ssh-add. If ssh-agent is already running, it should ask for your passphrase and unlock your keypair.
- If ssh-add failed with "No ssh agent found" or a similar message, then run eval $(ssh-agent), which starts the ssh-agent and loads its identifier into your Terminal session. Then, try ssh-add again.
- Try logging in, by typing ssh
username@150.108.20.61. The first time you try, it will warn
you that the server is not known and offer a fingerprint. Please
check the server fingerprint against the list on this page. If the
fingerprint ever changes after this time, SSH will warn you that
something malicious may be happening.
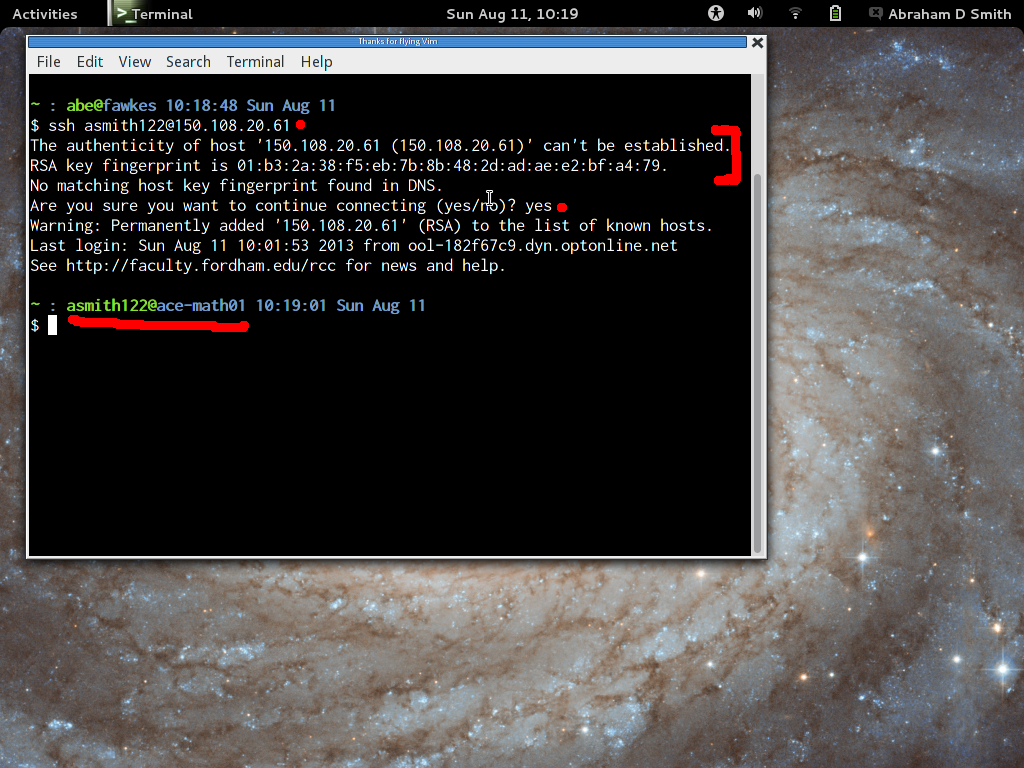
- If the you see a login message and a command prompt saying "ace-math01", then everything worked!
Connecting with SSH (normal operation)
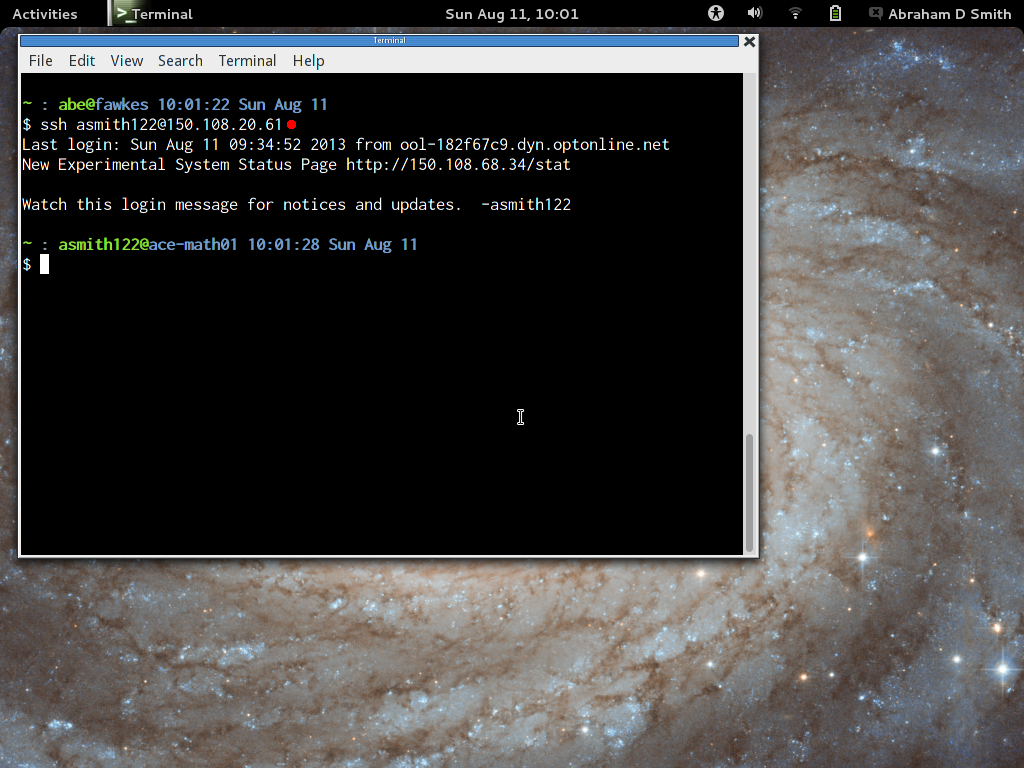
- Open a terminal window and type ssh
username@150.108.20.61. If ssh-agent is running properly, it
should not ask for your passphrase, as your keypair is already
unlocked.
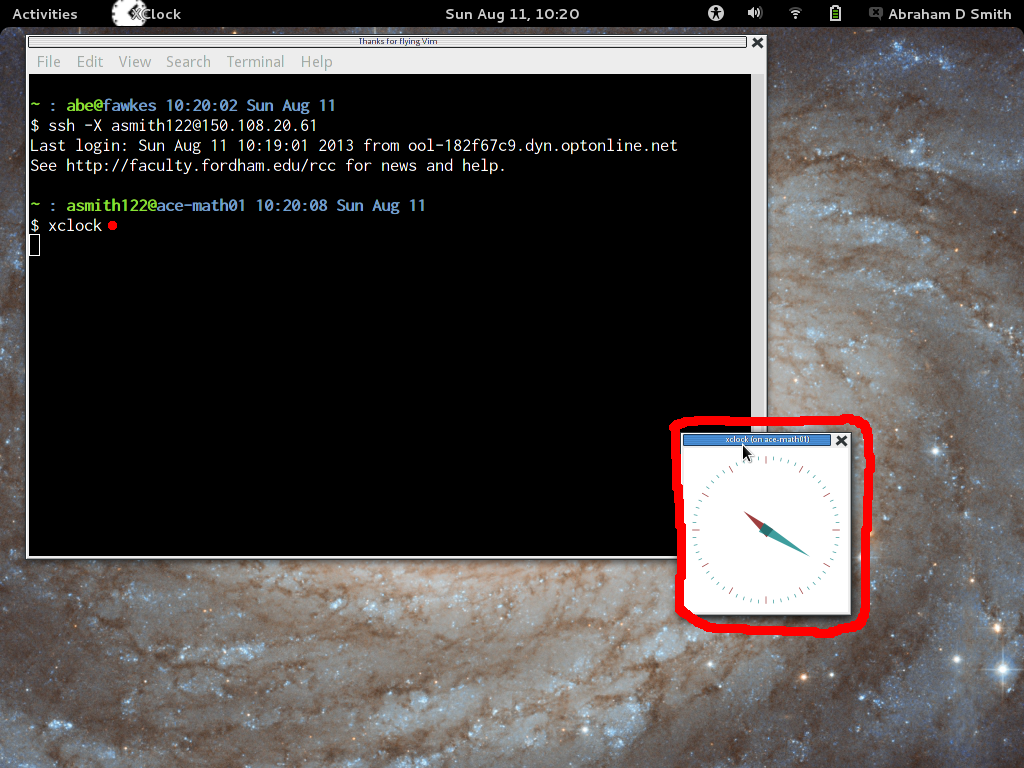
- If you want graphical programs to run on the server and display
their windows on your workstation, then try the "-X" switch.
Moving Files to/from the Server
SSH allows you to move files over the network using the scp or sftp commands. A more efficient way for bulk transfers is to use rsync, which can recursively transfer entire directories while only moving the changed parts of files. For example:
- scp my_file username@150.180.20.61: This will copy the local file my_file (in your current working directory) to the location ~/my_file on the server.
- rsync my_file username@150.180.20.61: Same thing for rsync.
- rsync --archive my_directory/ username@150.108.20.61:my_new_directory/ Note the trailing slashes, they are very important!! This will recursively copy the contents of the local directory my_directory/ to the contents of the remote directory ~/my_new_directory/. If you run the command a second time, it will only send the changes. When using rsync, try adding the -n option to see what would be sent without actually sending it (so that you don't accidentally clobber files at the destination). My favorite options for rsync are first to check with -Pain then to run it with -Pai. Of course, read the man page.
Advanced Options
A good rule of thumb for computers is "if you are typing a complex command more than twice, you are doing it wrong." SSH allows several options to be set for every connection on a per-server basis, using the configuration file ~/.ssh/config. Here is an example:
Host ace1Hostname 150.108.20.61
User asmith122
BatchMode yes
Compression yes
FordwardX11 yes
DynamicForward 9051
LocalForward 8080:localhost:8085
This means that I can type "ssh ace1" and many of my favorite options are automatically used. In this case, it saves me from typing "ssh -C -X -D 9051 -L 8080:localhost:8085 asmith122@150.108.20.61".
It is wise to read the System Manual Pages obtained from the commands "man 1 ssh" and "man 5 ssh_config" to learn what is possible with SSH.
Instructions for SSH on Windows workstations
Background
For complete functionality, three programs are used. However, some of them are optional:
- The PuTTY suite, which is necessary.
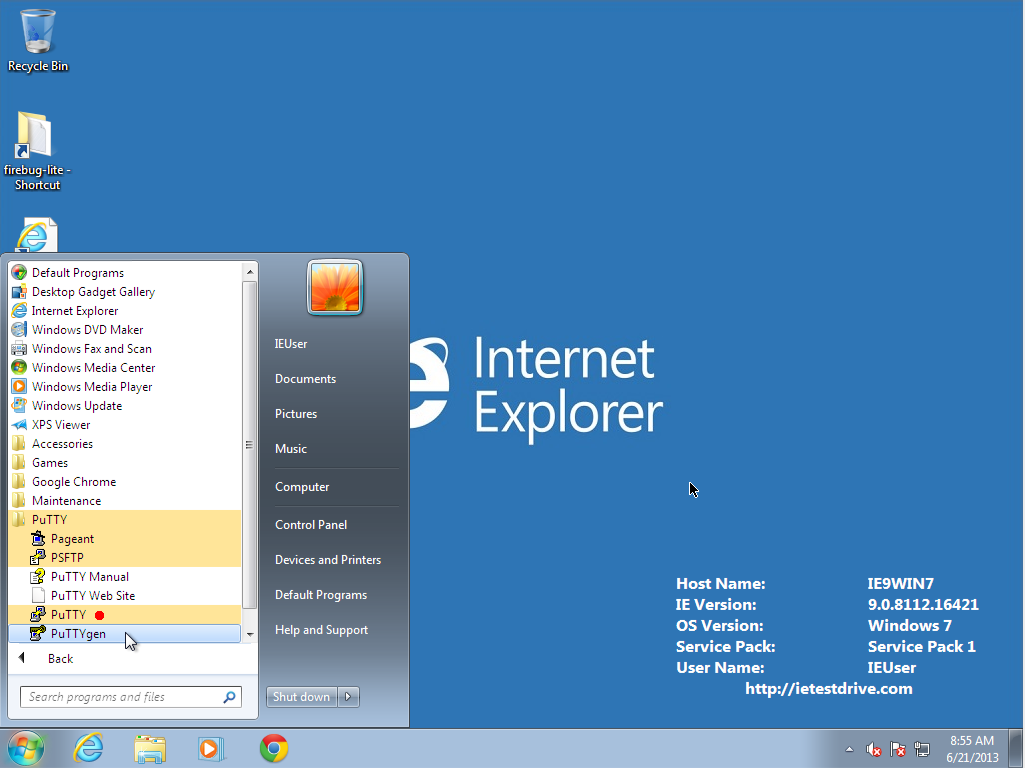
- PuTTY itself, which provides command-line access to the server.
- PuTTYgen, which creates a cryptographically secure keypair that will be used for your logins.
- Pagent, which conveniently manages your keypair.
- WinSCP is a nice program to send files back-and-forth between your workstation and the servers. If you don't mind using the command-line file-copying tools in PuTTY, this is optional.
- The Cygwin/X module of Cygwin (or the alternative Xming which works very well but requires a small donation to the developer), which allows your workstation to draw windows for graphical programs that are running on the server. If you only use command-line tools, this is optional.
Installation and Configuration of PuTTY (and keypairs)
1. Download Package, Make Keypair, Configure PuTTY (Do once per workstation.)
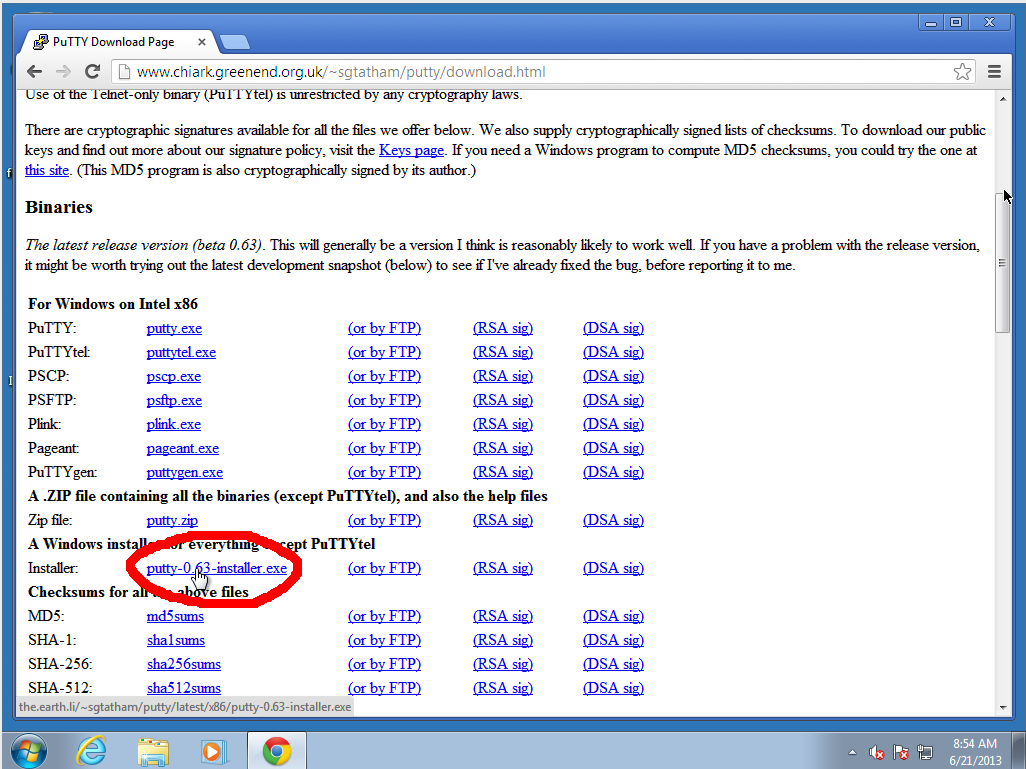
- Download and run the Windows Installer package from http://www.chiark.greenend.org.uk/~sgtatham/putty/download.html
that includes all of the putty suite.
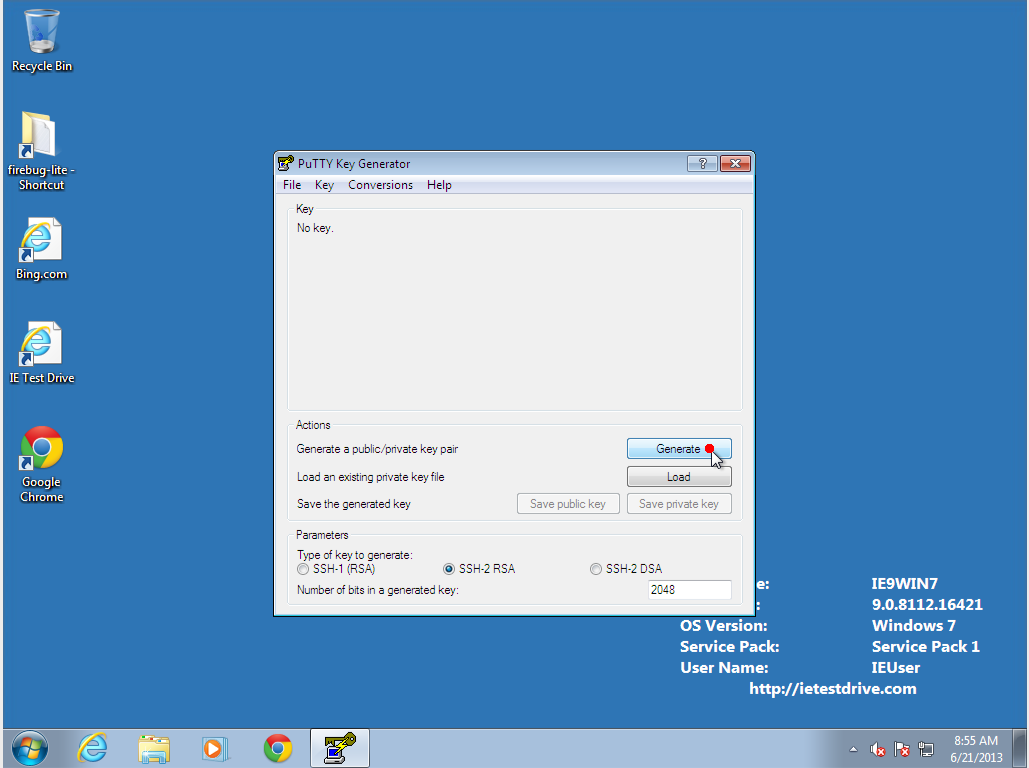
- Run PuTTYgen, which will help you produce a keypair.

- In PuTTYgen, click "Generate." It will ask you to move the mouse around to
generate random noise to make your keypair.
- Protect your keypair with a long passphrase. You don't have to
enter the passphrase very often, so make it very long and easy to remember.
For passphrases, length is more important than crazy characters. Try something
like a complete sentence telling a little story: "When Sally was an 8-year-old, her Labrador puppy Henry ate the birthday cake."
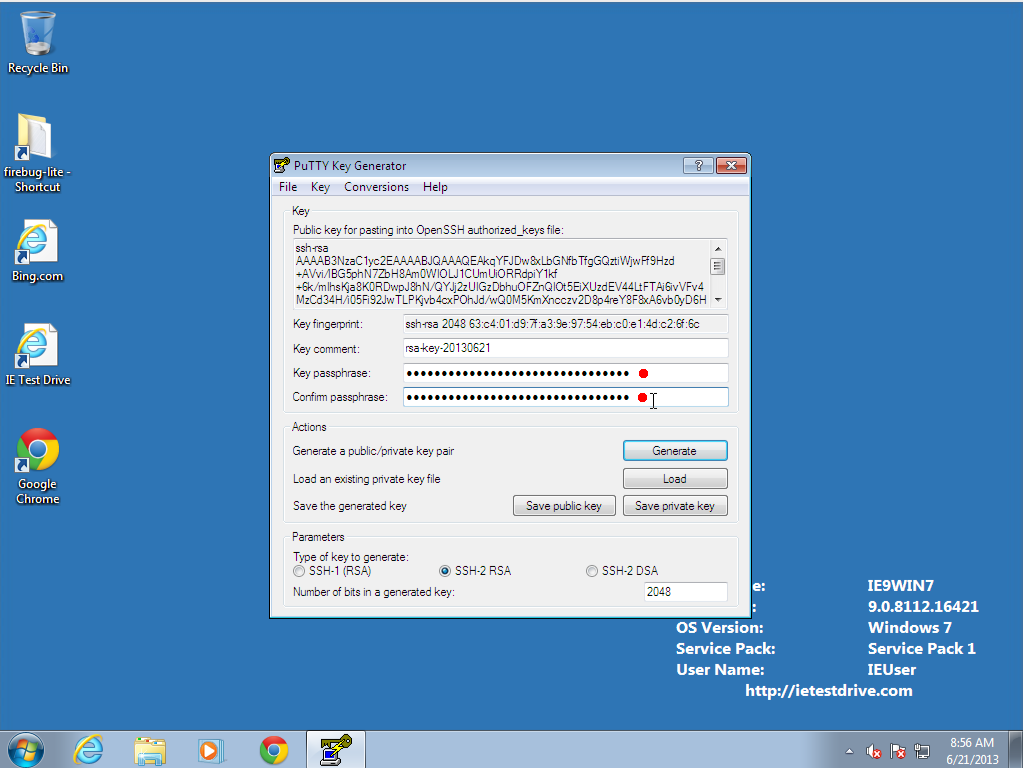
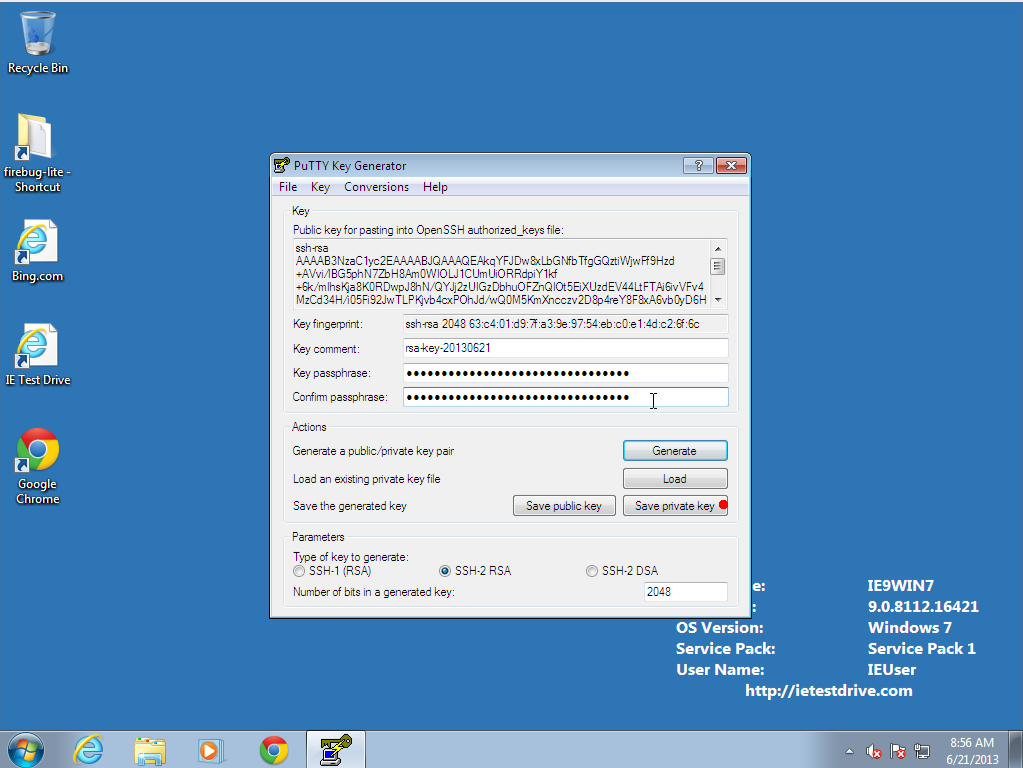
- Save the private key, which will make a putty .ppk file KEEP THIS FILE
SAFE! Do not share it even between your own computers;
instead, generate a separate keypair on each computer you use.
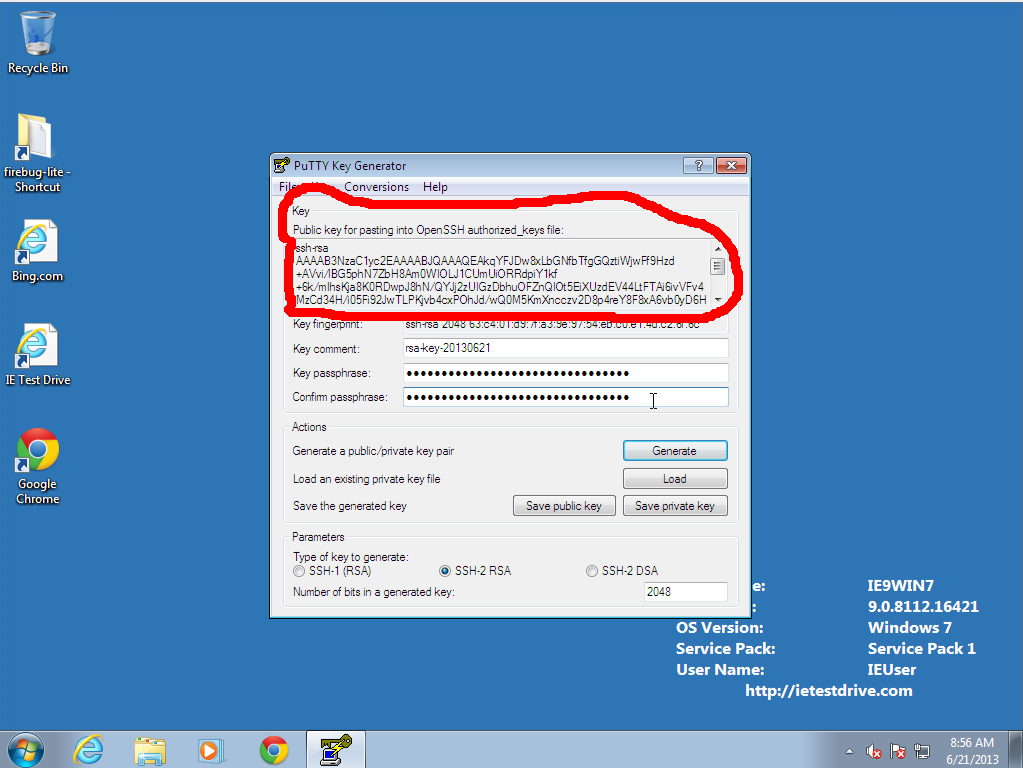
- Copy the text in the "Public key for pasting into OpenSSH
authorized_keys file" block, and paste it into the RCC Account Application Form or email it to the administrator at rcc@fordham.edu
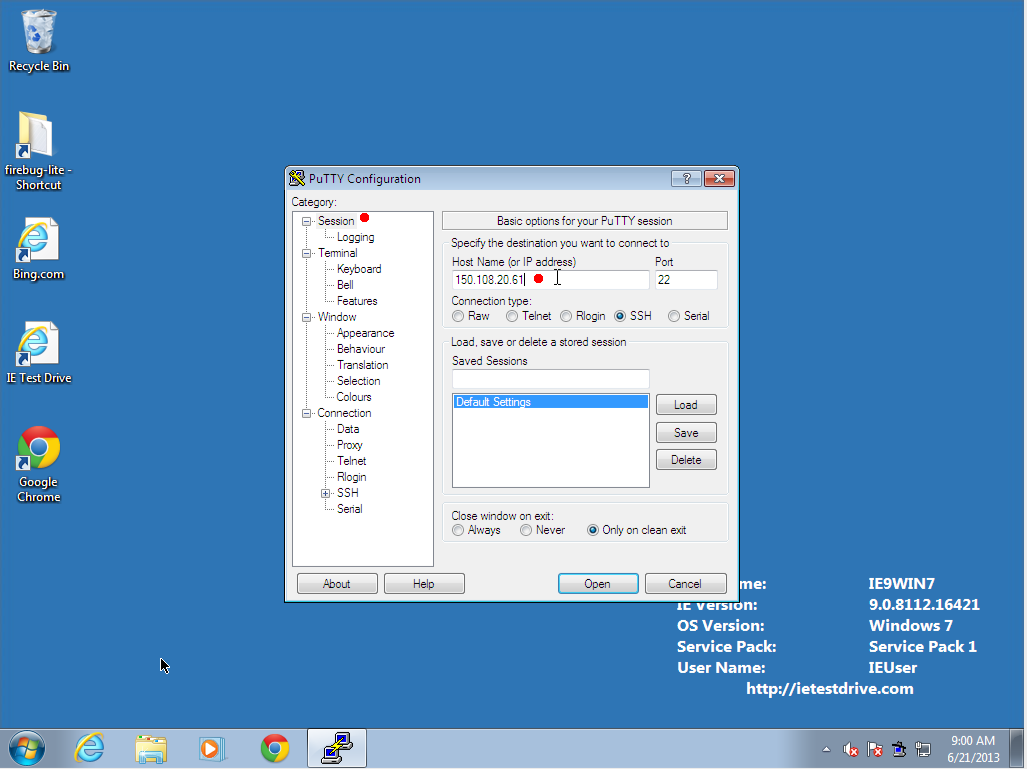
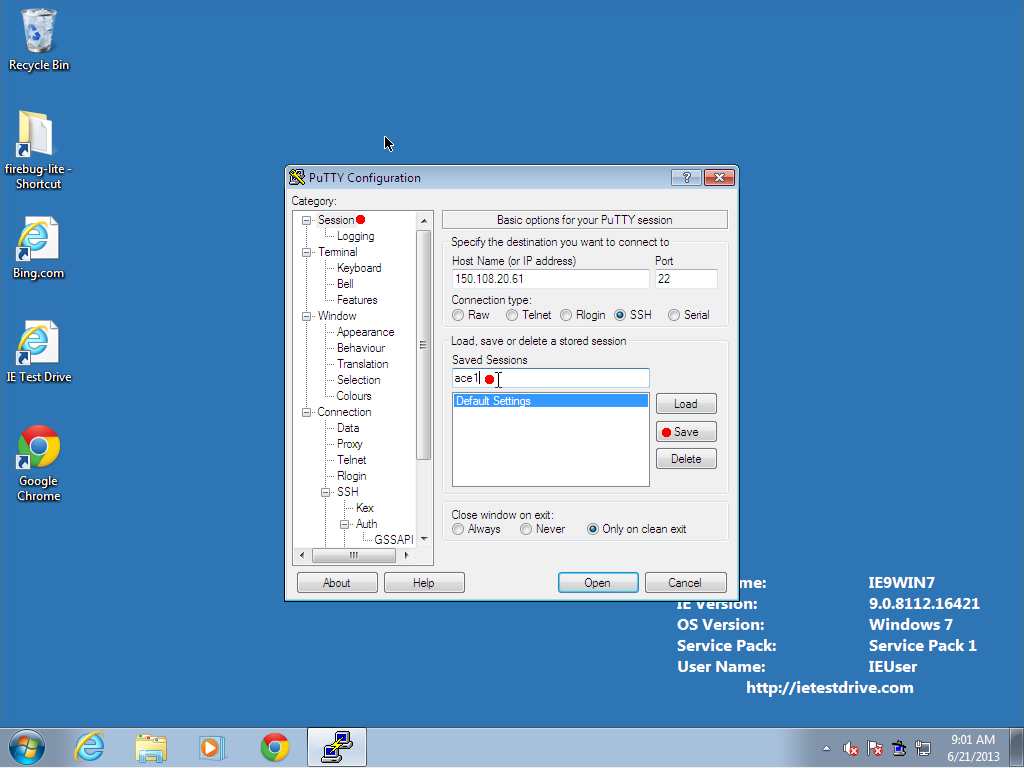
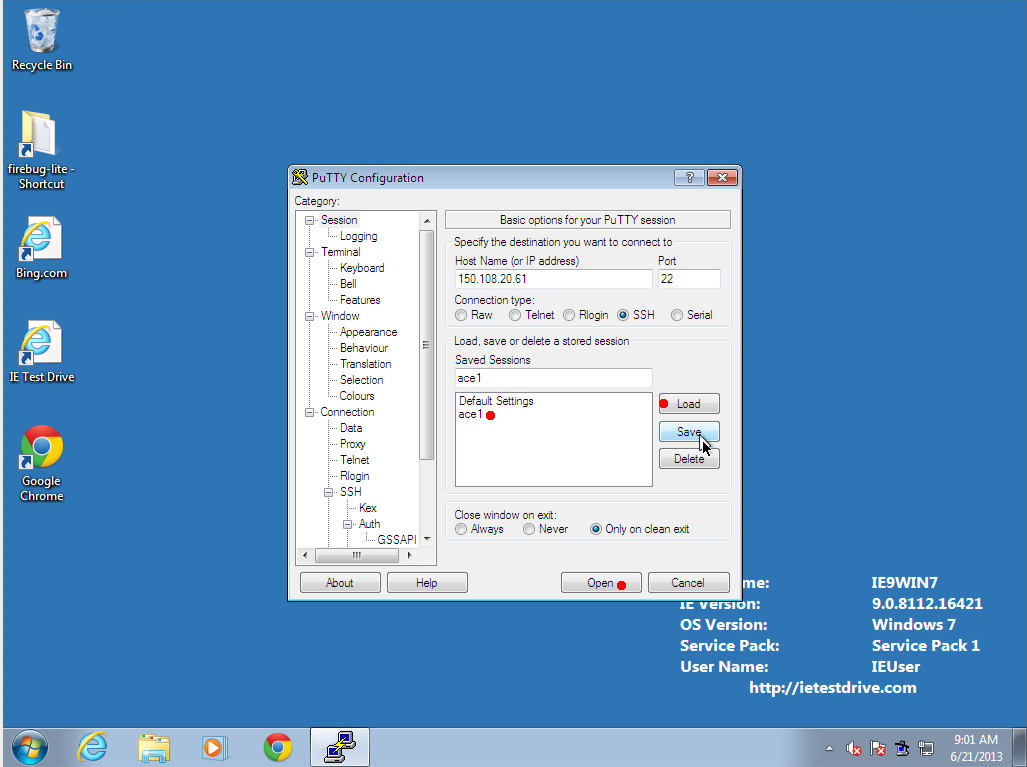
- Launch PuTTY to configure your connection to the server.
- Under the Session menu, enter the server address (currently
150.108.20.61 or 150.108.20.62)
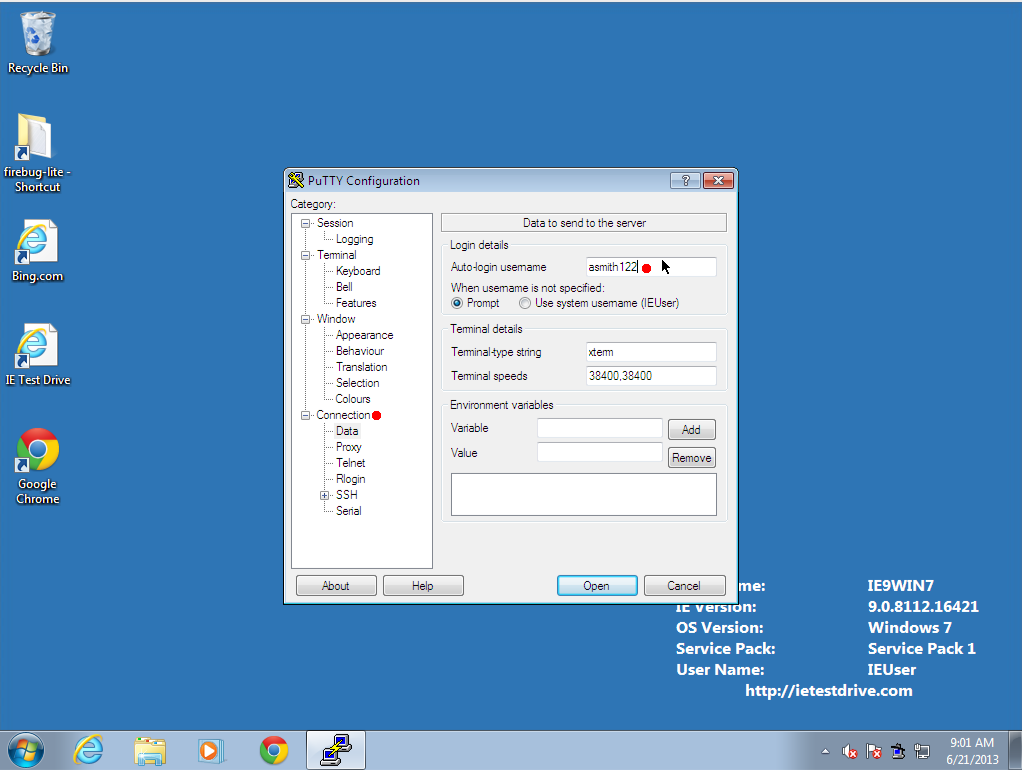
- Under the Connection menu, enter your login name (your Fordham ID).
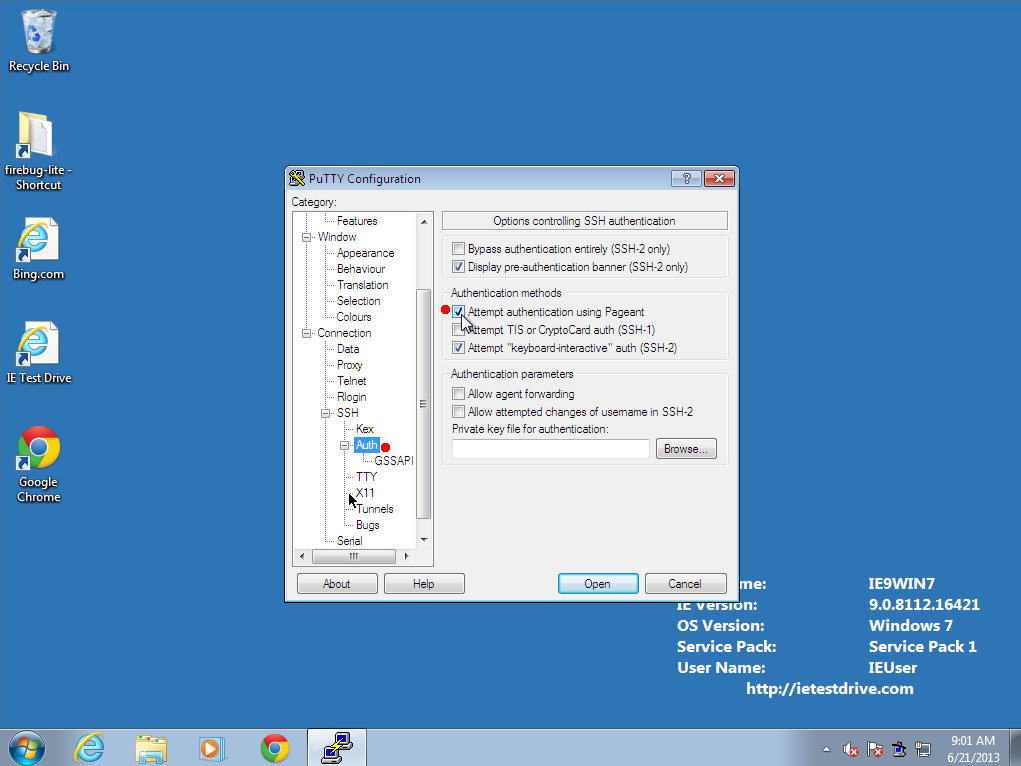
- Under the Connection--SSH--Auth menu, make sure that "Attempt to
authenticate using Pagent" is checked.
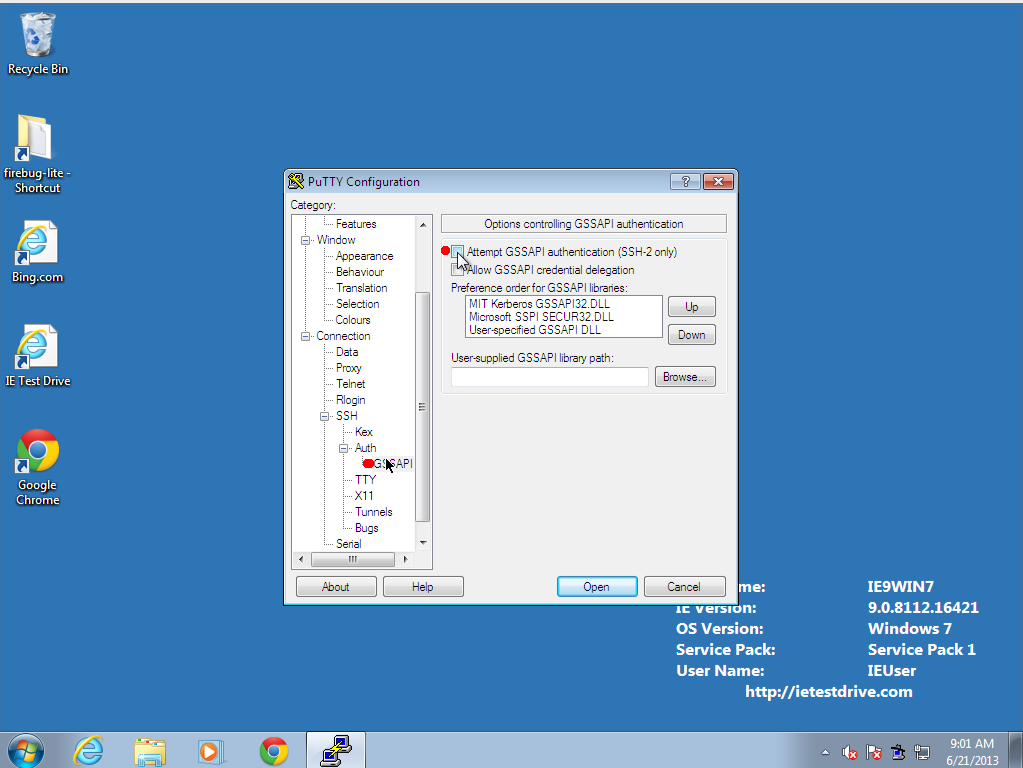
- Under the Connection--SSH--Auth--GSSAPI menu, make sure that
"Attempt GSSAPI authentication (SSH-2 only)" is not checked.
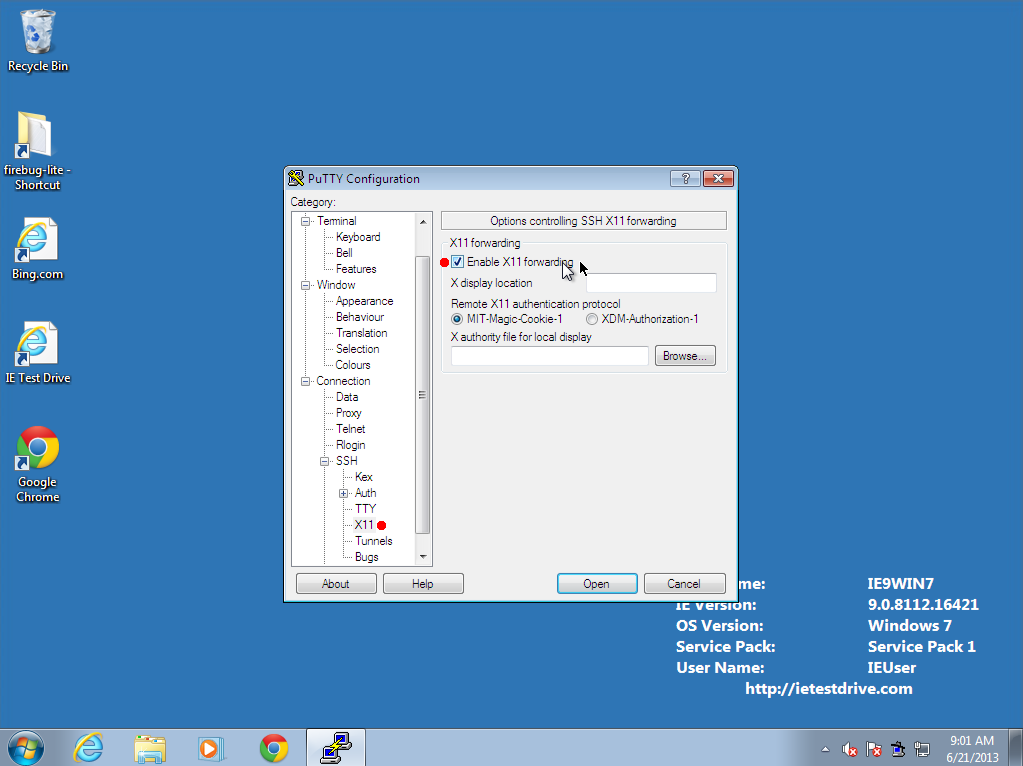
- Under the Connection--SSH--X11 menu, make sure that
"Enable X11 forwarding" is checked.
- Go back to the Session tab, and type in a name under which to save
this configuration, and hit Save
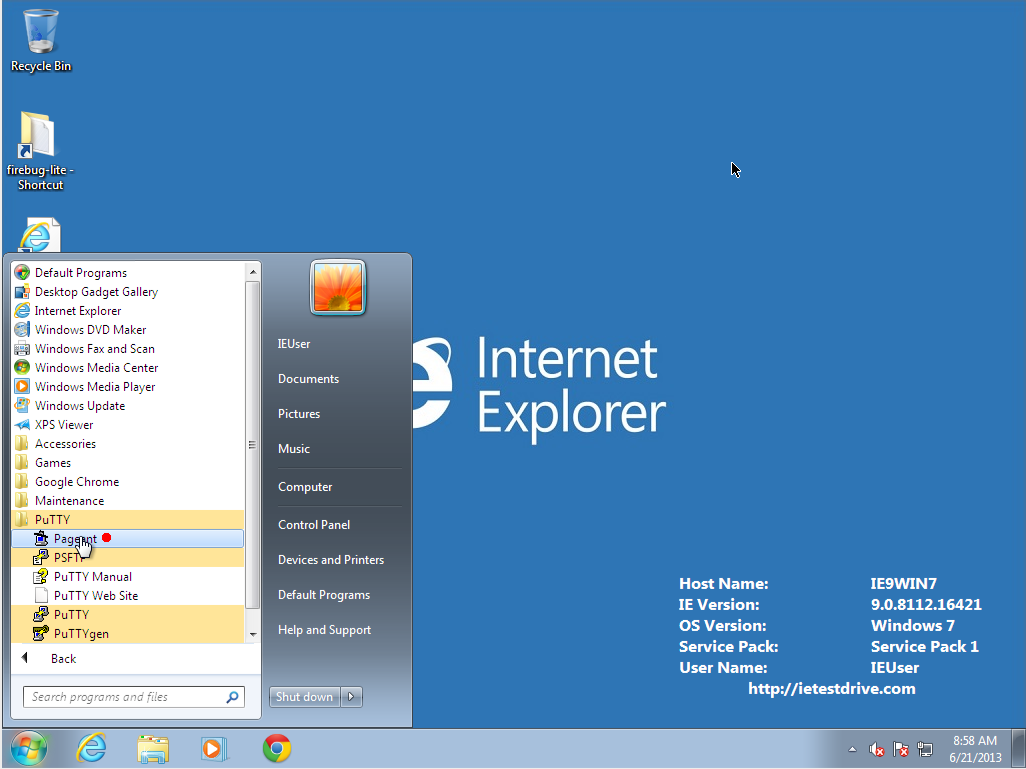
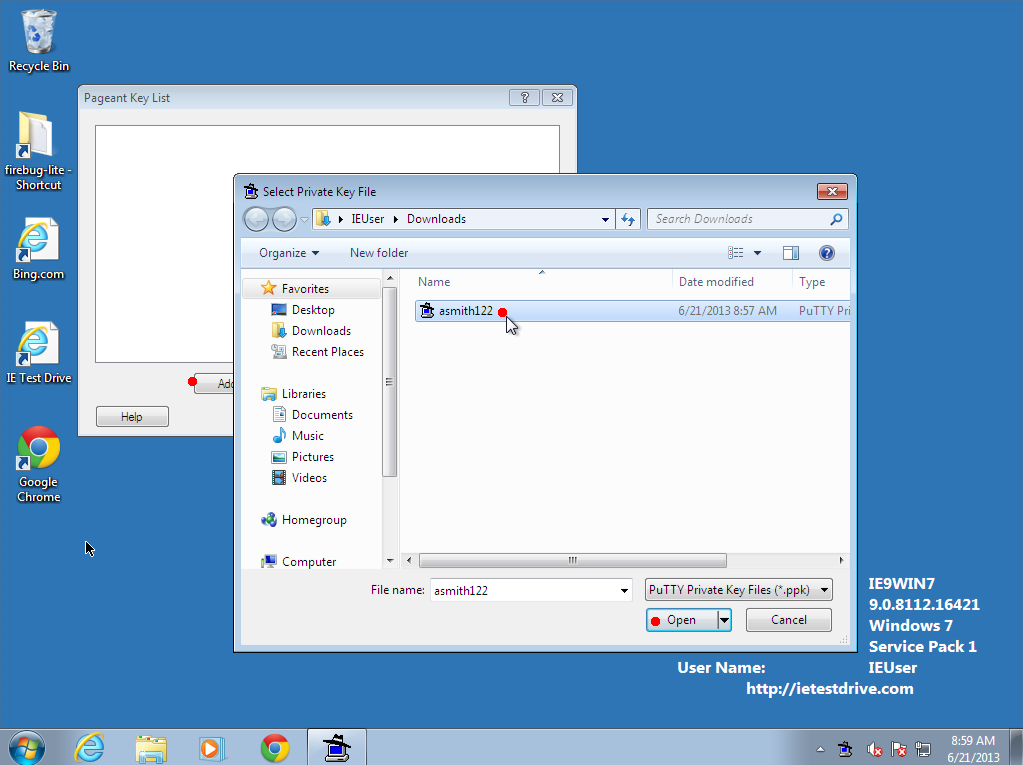
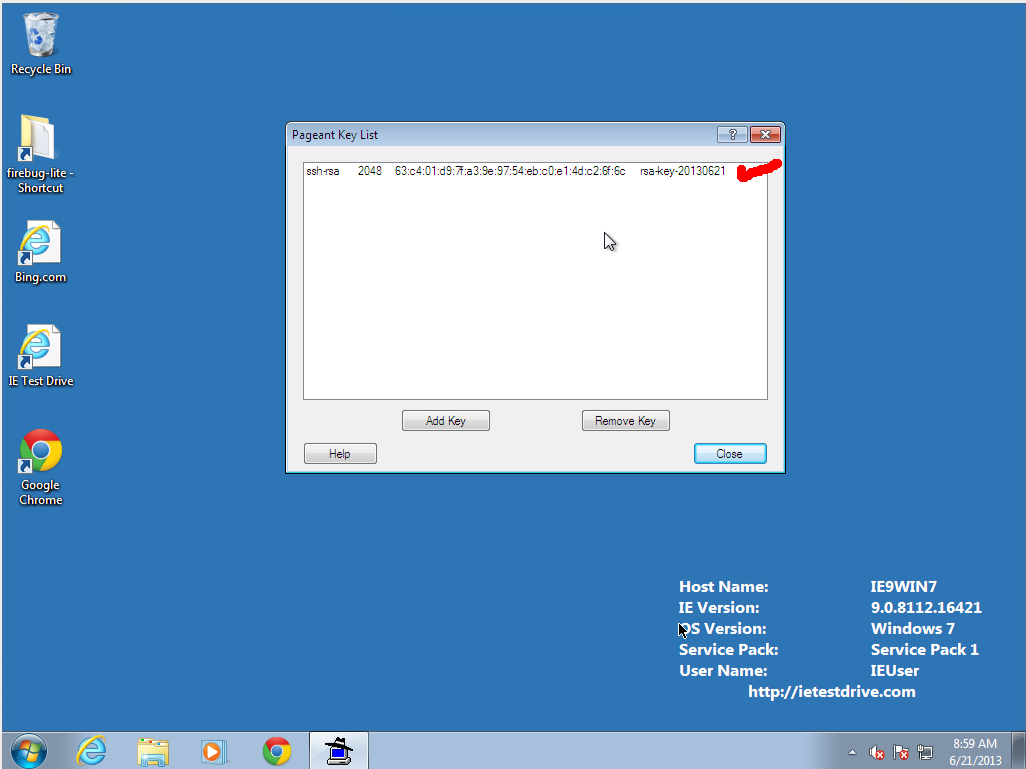
2. Start the Pagent authentication agent (Do once per reboot of your workstation.)
- Run the Pagent keypair authentication agent, which will run in the tray.

- Right-click on the tray icon to load your key. Click "Add" and select the
key you generated earlier. It will ask for your Passphrase.
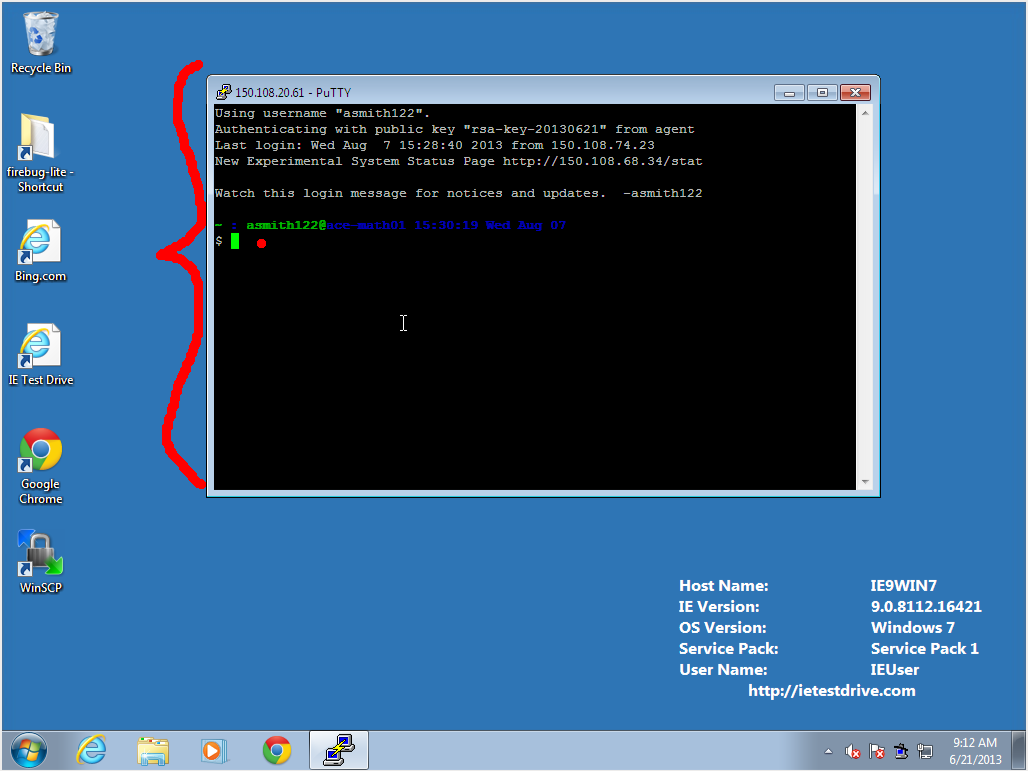
3. Using PuTTY to connect (normal operation)
-
Launch PuTTY.
- Select your saved session and hit "Load" then "Open"
- The first time you connect, it should tell you the server's fingerprint, to make sure your network connection is not being intercepted by spies. If you Please double-check that the fingerprint matches one listed at the top of this page. If it does not match, feel free to contact me to see if there is something strange happening. Otherwise, select "accept". If the fingerprint ever changes in the future, either the administrator broke something or your international enemies are trying to intercept your communications.
-
You should now have command-line access to the server:
Installation and Configuration of WinSCP (optional, for easy copying)
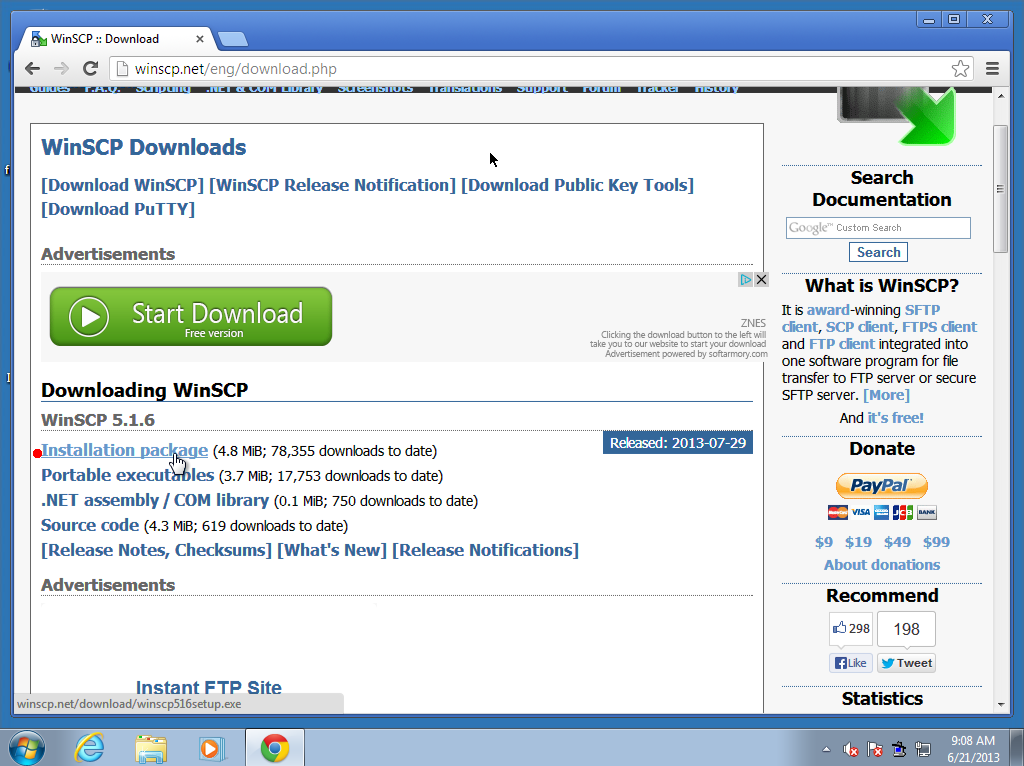
- Download the Installation Package from WinSCP.net
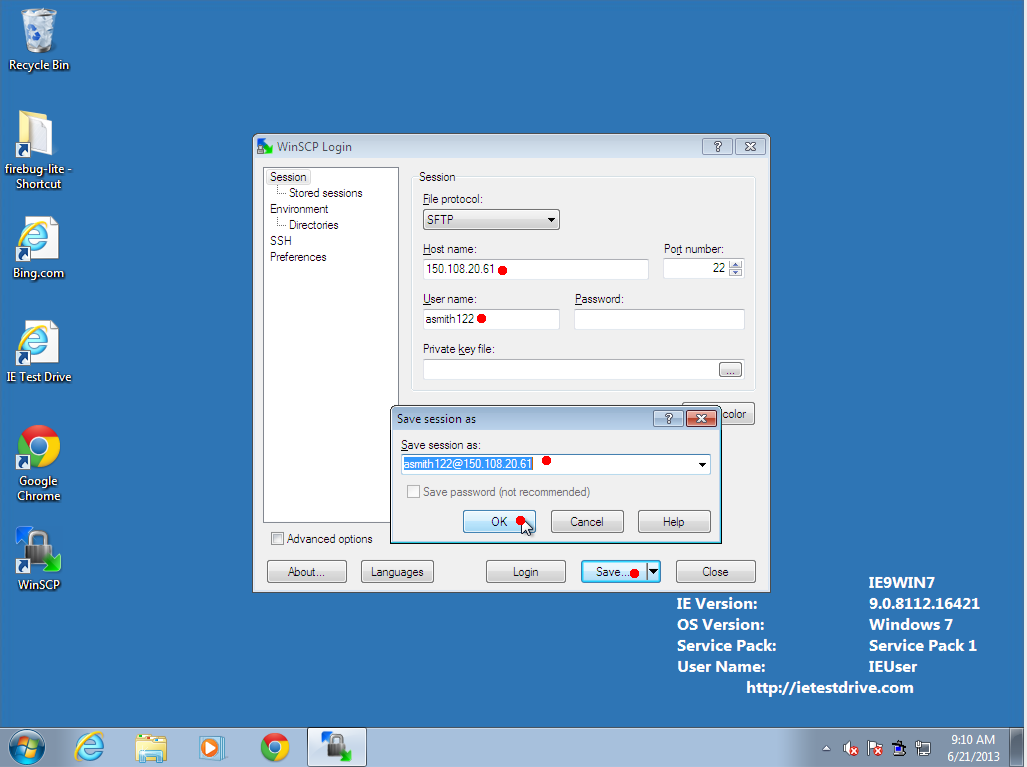
- Run the program, and fill in the same account information as you used in
Putty. Do NOT set a `private key file' or `password'. The running
Pagent process will automatically authenticate you!
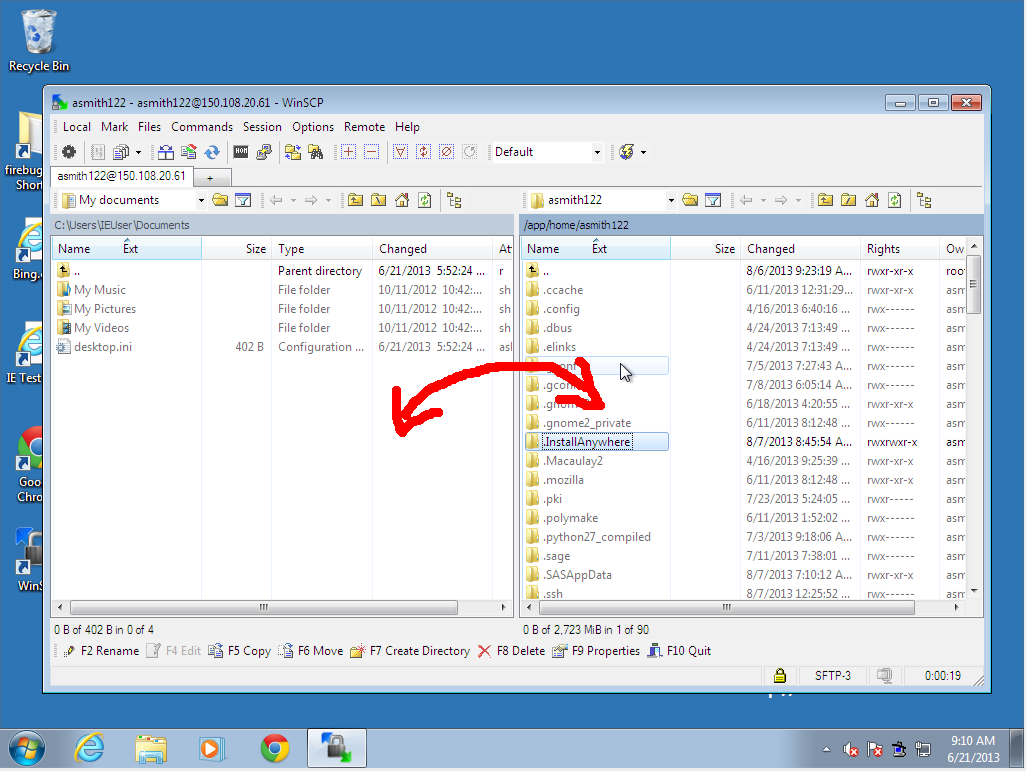
- Drag-and-drop files between your workstation (left) and the server (right).
Installation and Configuration of Cygwin/X (optional, for graphics)
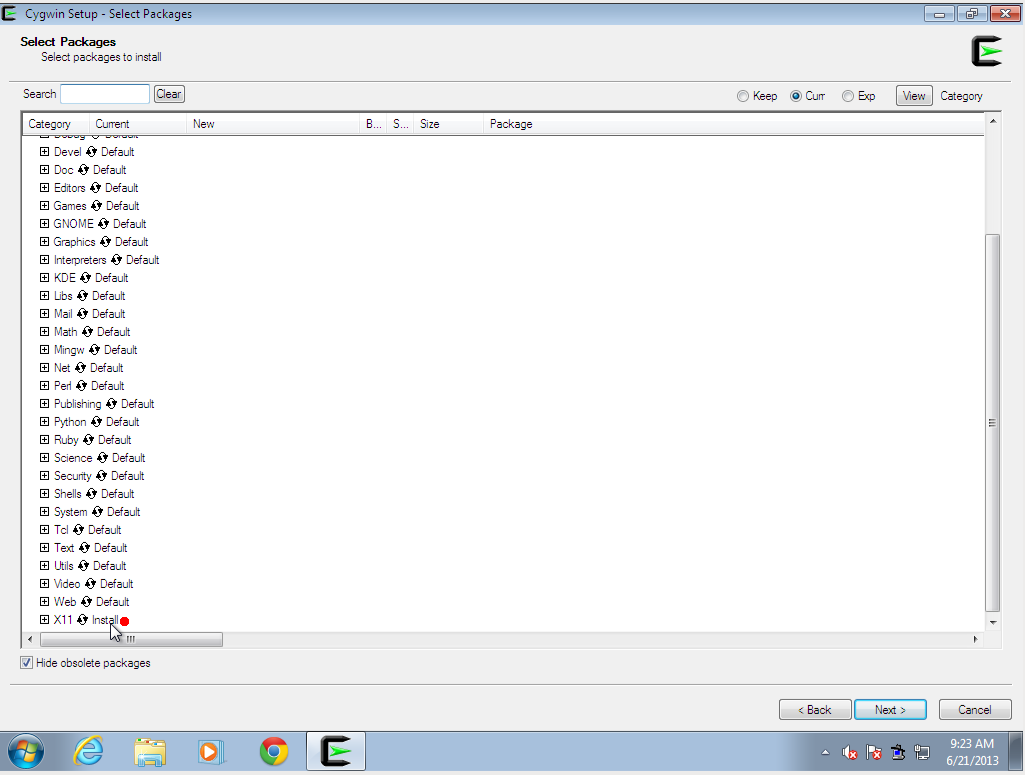
- Download and run the setup program from cygwin.com
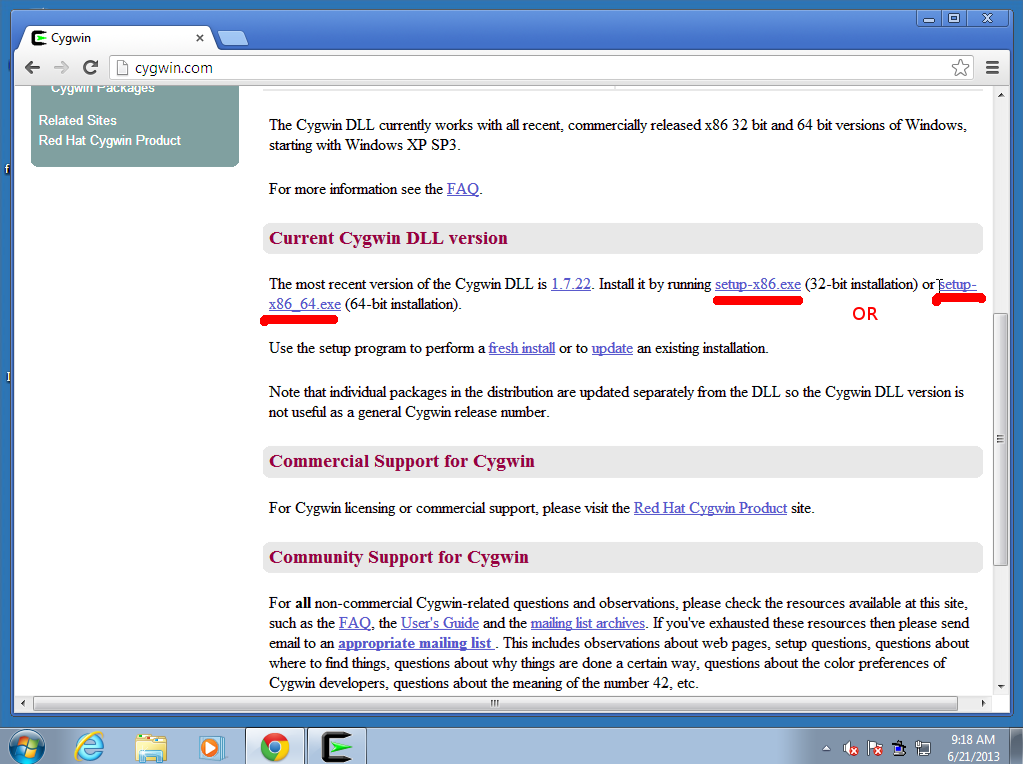
- Cygwin has many components it can install (effectively reproducing a
complete UNIX environment in Windows). We need "X11", so make sure that
is selected. Cygwin downloads a lot of packages and will take a long time to install, perhaps an hour.
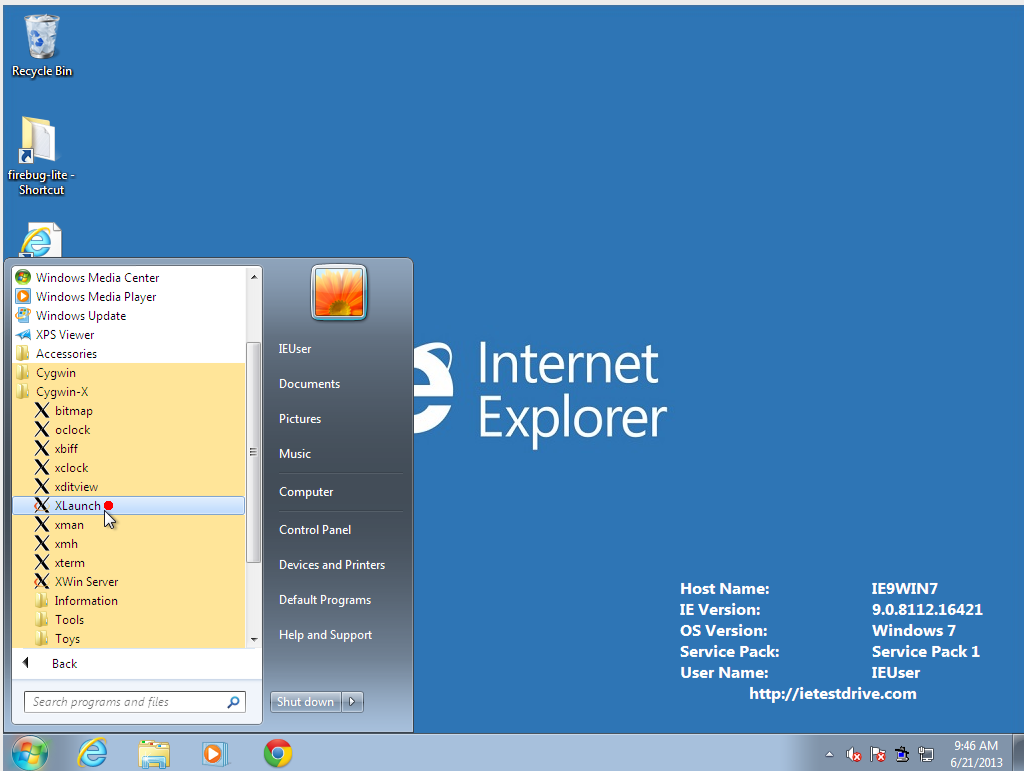
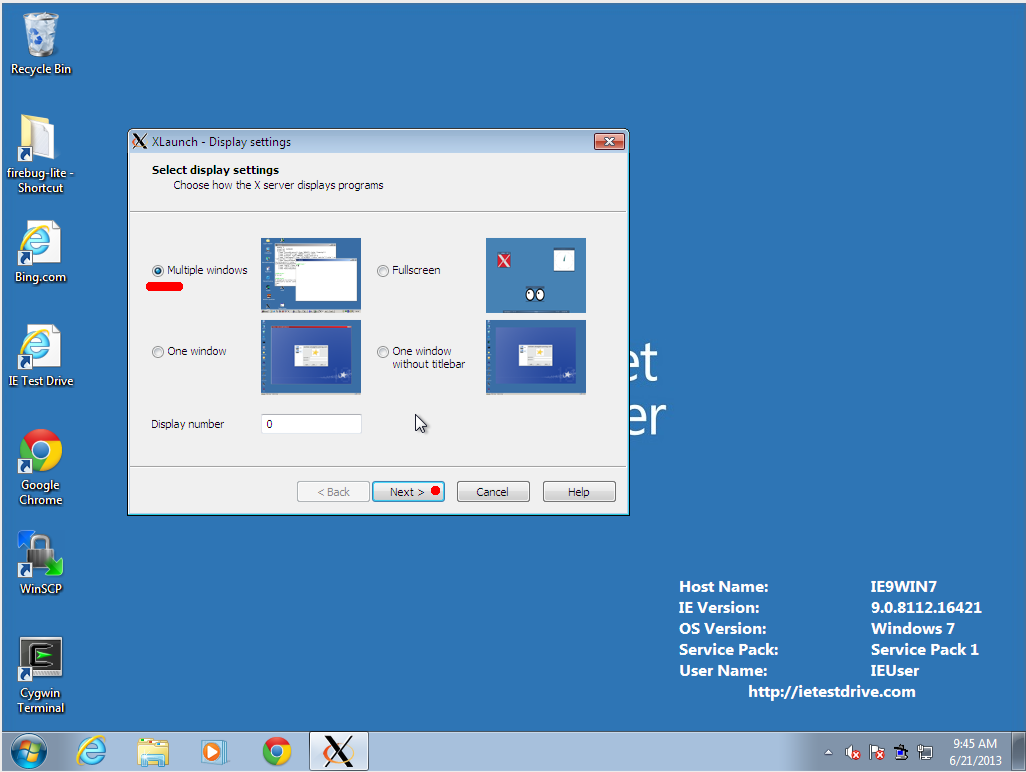
- Run XLaunch
- There are several display styles. Most people prefer the "Multiple
windows" one.
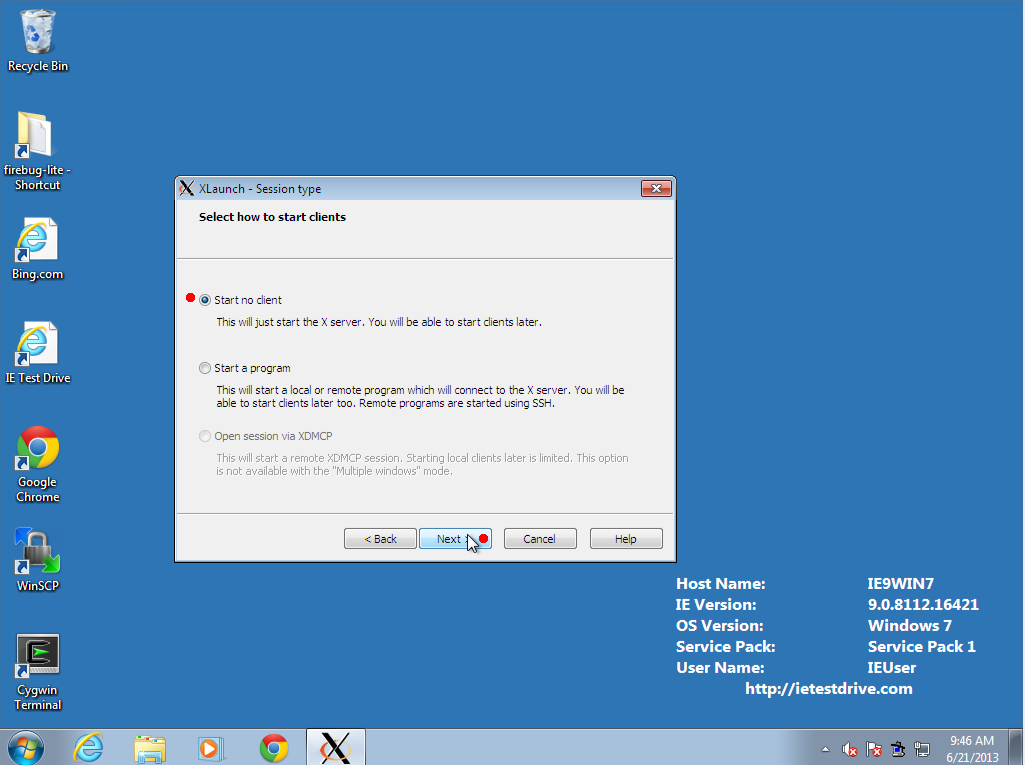
- Select "Start no client" so that Cygwin/X will run in the tray as a
service.
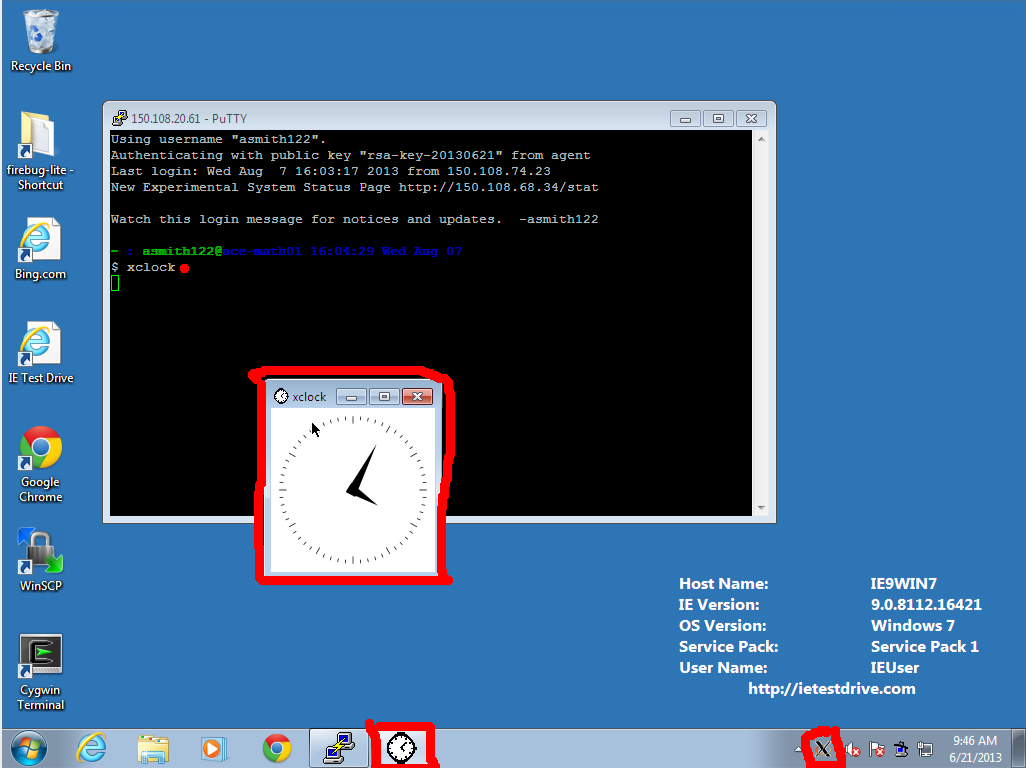
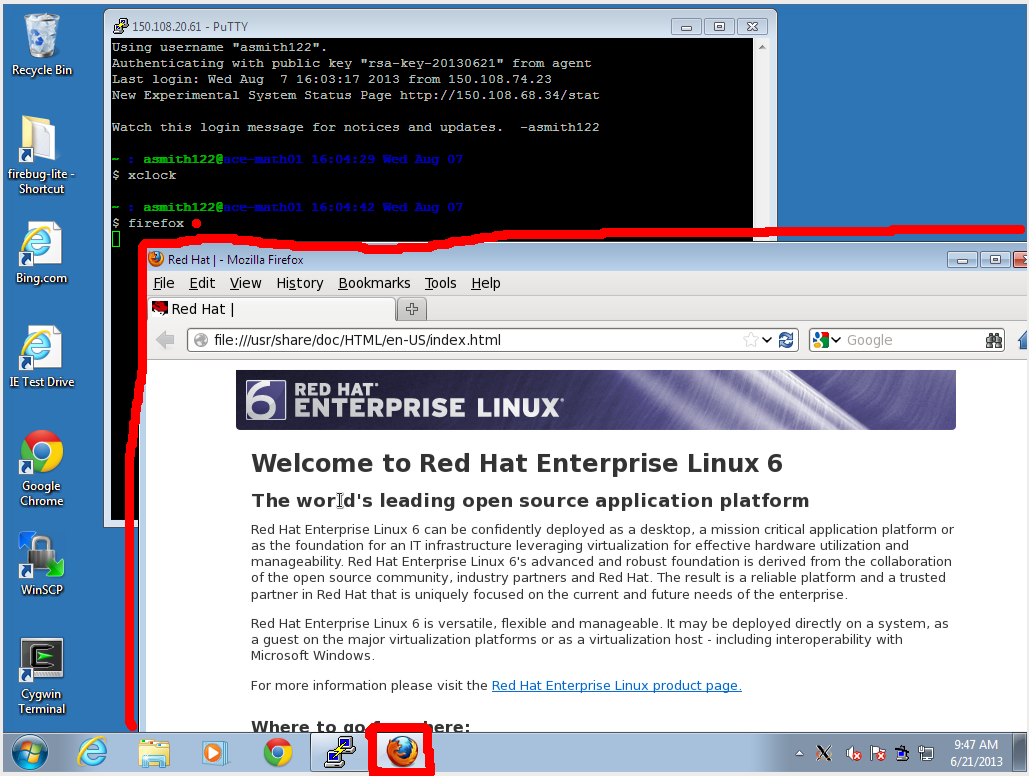
- Log into the server using PuTTY, and try to run a graphical command, such
as "xclock" or "firefox". The software will run on the
server, but its window will be drawn on the screen at your workstation. This
should be reasonably responsive at Fordham, but it may be unbearably slow from
a home DSL connection.
Tricks and Tips in the Linux Shell
The Bash interactive shell
Session Management
Documentation
Maintaining and sharing code
©2013 Fordham University
Rose Hill Campus Bronx, NY 10458 (718) 817-1000
Lincoln Center Campus New York, NY 10023 (212) 636-6000
Westchester Campus West Harrison, NY 10604 (914) 367-3426